
[message_box type=”info”] This week we have a guest post from LunarLincoln Intern Dheeraj Namburu. He spent last month working on his very first app project and we wanted him to give us a breakdown of his initial foray into development and his take on our product-process. Enjoy! [/message_box]

Coming up with a good app idea is hard: it needs to be unique, useful, and attractive enough to attract a paid user. Hitting all of these criteria is essential in developing a successful app as I’ve learned these past few weeks. My first app ”The IFJ Reader” was a tool to make reading Intercollegiate Finance Journal articles much easier on an iPhone. The important distinction with my app is that I wasn’t seeking a profit, I wanted it to be a learning guide so that I could move on to other projects.
The best way to start the ideation process is to come up with as many ideas as possible – brainstorm. Your first few ideas may suck but you’ll find one to stick with. Choose something you’d actually want to use and find a way to make it unique, useful, and profitable. I decided to make an app that would help other people in my organization read the work that they’ve published. It’s important to be passionate about the idea you have while having some support from the user base. Your focus won’t dwindle when you get frustrated with all the minor issues that pop up because you will be accountable to the people for whom you’re making the app. You will fatigue, so you might as well choose something that you would appreciate spending day and night on (not that you will but still).
Planning Is So Important
The less you change your app design throughout your development process the fewer headaches you’ll suffer. Getting to create your own app gives you the ultimate control over the end product. I initially overreached on my first app and tried to add features like favoriting and searching that took too long to implement. Learning to trim the fat for your first MVP (Minimum Viable Product) will be invaluable while you’re designing your app.
It’s also important to understand the need that your app fills. If a feature doesn’t promote the solution that your app promises, that feature may need to be revised or scrapped entirely. It’s important to keep the scope of your app narrow, so that your focus is driven towards things that will reap the biggest benefit for a user.
Also, it’s important to do market research; it’s more than likely that someone has created something similar and you should take that into consideration. I looked at other RSS feed reader apps and determined what features they’ve implemented and what I could do better than them. Is the market saturated? If so, is your app specific enough that the people in your niche would use your app over others? Act like a user: Is your app flashy enough to capture the two-second attention span of an average human being? Is it compelling enough to compete with similar apps? While these criteria are important when trying to make a commercial success, it may be worthwhile to fulfill these criteria even on a side project. I made sure to develop an app that fit a small enough niche, that even in the RSS feed-reading category, my app would appeal to readers of the IFJ.
Make Rough Estimates
Determining how long it takes for one to finish a task is an invaluable skill that takes time and practice to develop. Making estimates is a key tool to help finish projects on time. Appropriate estimates can help determine what the timeline is and if certain features can be added or cut based on the time frame remaining.
I wouldn’t worry if your time estimates were wrong, my first estimates were all over the place. Wiley helped narrow my focus and develop a more realistic timeline and this helped me take an app that I thought I could develop in a week, to a more manageable 3 week timeframe. The entire estimation and user story process allowed me to break a big task into smaller ones and allowed me to appropriately allocate my time to different tasks.

Not only do rough estimates help you plan, they also feel rewarding whenever you finish a story. These small successes help you realize your goal and help fatigue from setting in, but they may also cause some tunnel vision. It’s important to avoid focusing so much on the small tasks and neglecting the bigger picture. It’s hard to see the end when it’s nowhere in sight, but it’s a good habit to step back once in awhile, admire what you’ve accomplished and get right back to work.
func startDeveloping () {
Congrats! You’ve come up with an idea that you like, you’ve conducted market research to refine the idea, and you’ve created some rough estimates for each feature you want to implement. Now comes the actual coding part. Depending on your app, it’s important not to reinvent the wheel; just do a cursory search on Google to find libraries or examples of apps that attempt something similar. This way, you’ll save time and effort by piggybacking off of someone else’s work. Keep in mind, if you run into errors, debugging someone else’s huge code base written five years ago won’t be easy. Taking into account the benefits and drawbacks of outside codebases, it’s important to use them wisely, while writing custom code for any critical functions.

Coming in as a first time iOS app developer, I was kind of frustrated with the fast pace of mobile development. I learned to write in Swift but a lot of answers online were in Objective-C and translating between the two was difficult. I used a lot of help from the veteran developers here (everyone but me) so I had a competitive advantage. However, StackOverflow and Stanford’s online app development course were invaluable debugging tools. I’m glad I live in the age of the internet because I would’ve asked a lot of stupid questions in the office without it!
}
QA and Review – Make Sure Your App Works
QA was minimal for my project, I mostly utilized my own testing of the app installed onto my phone to test the features that I wanted to and to ensure that the app would layout UI elements properly. I would fix whatever I could and then ask the developers here how to fix the other issues. Jennifer gave me valuable UI critiques, while Wiley, Patrick, Travis and Jack helped me write reusable and robust code.
While testing in-house is appropriate when creating a final product, it’s important to test the app in the field with actual users. To refine my idea, I decided to add some of the members from the IFJ to “TestFlight” the app. Having external testers requires a beta app review, but it also allows for easy app testing from end users, and this step can bring in valuable information for later revisions. Analytics and testimony from the users can help pinpoint trouble spots in one’s app and allows a developer to apply a polish that appeals to the end user.
Once all QA is completed, it’s a good time to send the app to review by Apple via iTunes connect. Get your killer app icons, screenshots and description text ready as you head to the App Store while you gear up to submit!
Post That App
The best part of doing all of this work is submitting to the App Store! Congrats, you’ve gone through the process of completing the development cycle of an iPhone app. Assuming your app has passed Apple’s review process, you can now post in the App Store. Pop out the champagne and celebrate!
Oh, but wait, no one’s gonna download your app if you don’t promote it… get out that old Twitter/Instagram account and start posting! Reach out to other people you know to get them to tweet about the app, do everything you can to get your app’s name out there. Leverage social media accounts, email lists, paid and free ads, anything that will get your app to the top of the App Store list.
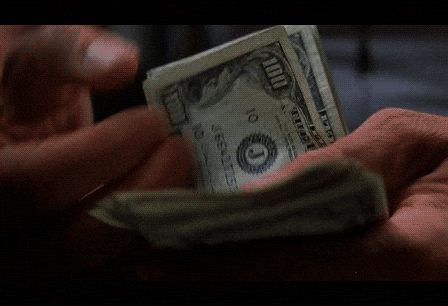
Bathe in the Digital Benjamins
In the end you’ll have shipped your first app to the App Store. A process that might feel long and difficult, but relatively painless when compared to traditional application shipping. Thank your Apple overlords as you rake in that sweet app money.